Error code 0x80070570 while installing Windows 8 64-bit

I was trying to install Windows 8 (64-bit) on a computer and I ran into the error message:
“Windows cannot install required files. The file may be corrupt or missing. Make sure all files required for installation are available, and restart the installation. Error code: 0x80070570”

My fist guess was that this had to do with the fact I ordered a windows version which stated “Pre-existing OS License and Product Key Required”. So I tried a clear install of Windows 7 (64-bit) and I got the same error message. I searched the internet and most posts were releated to failed burned copies. Since I had a legal DVD this was not the problem. I even tried two different ones.

The I found a post which mentioned this could be related to memory problem as well. So I started to remove DIMM’s one by one. When I removed the first DIMM, I even got a blue-screen and the PC halted. I put back this first one and I removed the second DIMM. The installation was really quick and no problems occur any more. So the 0x80070570 error code was in my case a faulty memory module.

So problem solved :)
Little Planet Photography

A while ago I saw a video on Picture Correct and I had to try this myself. I really loved the good tutorial by Gavin Hoey as he explains everything very well!

The equipment I used for the Photo below is:

The lens has a nice wide angle which helps a lot for this picture. If you don’t have a very wide angle you just have to take some more pictures.

The disadvantage of the Tripod I have, is that it has a ball head which rotates in all directions. It’s not possible to lock the camera vertically and only move it horizontally. It helped me for this picture to keep the horizon in the finder window on exactly the same position. Small errors are luckily fixed by Photoshop, so you don’t need to buy a new tripod(head).

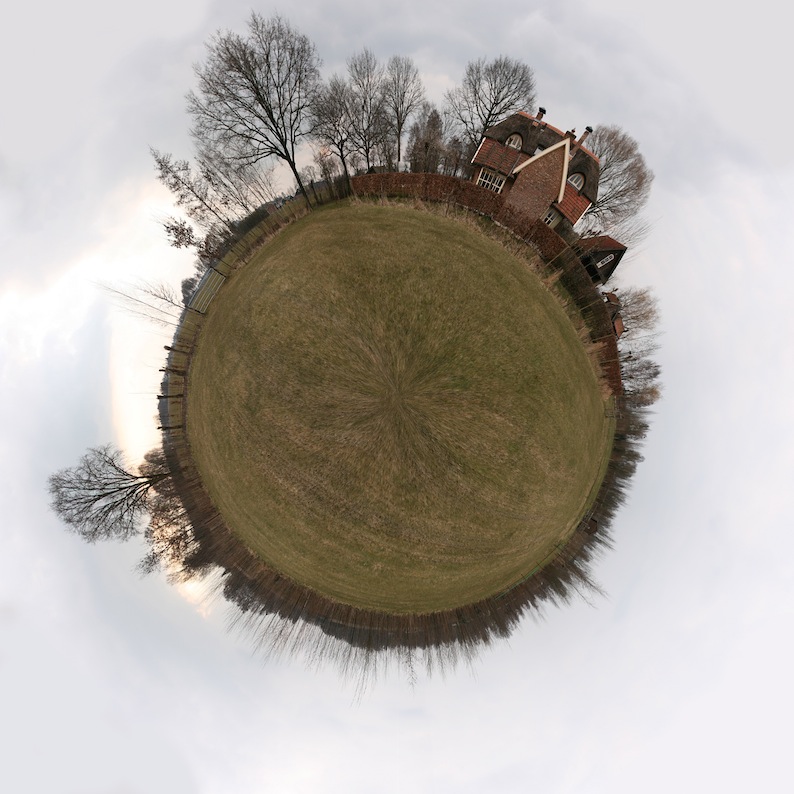
The result:

Little Planet
Little Planet by Tavenier

Time Capsule update 7.6.3 breaks IPv6

The latest version for the Time Capsule is at the moment is 7.6.3.
I installed this update and after the installation I experienced issues with my IPv6 connectivity. I googled around and found many discussions and blogs where people are explaining they have issues with IPv6 tunnels (6in4) after the update.

When I started my AirPort Utility I noticed that my native IPv6 configuration options are still the same. But the weird thing is that Apple somehow changed the IPv6 WAN address to address from the 6to4 prefix (described in RFC 3056). This prefix starts with 2002: then followed by the IP Address converted to hexadecimal numbers, which together makes the /48 6to4 prefix.

So if my IPv4 address was 123.234.123.234 my 6to4 address would be: 2002:7BEA:7BEA::/48. You need to do the calculation from decimal to hexadecimal (123 = 0x7B and 234 = 0xEA).

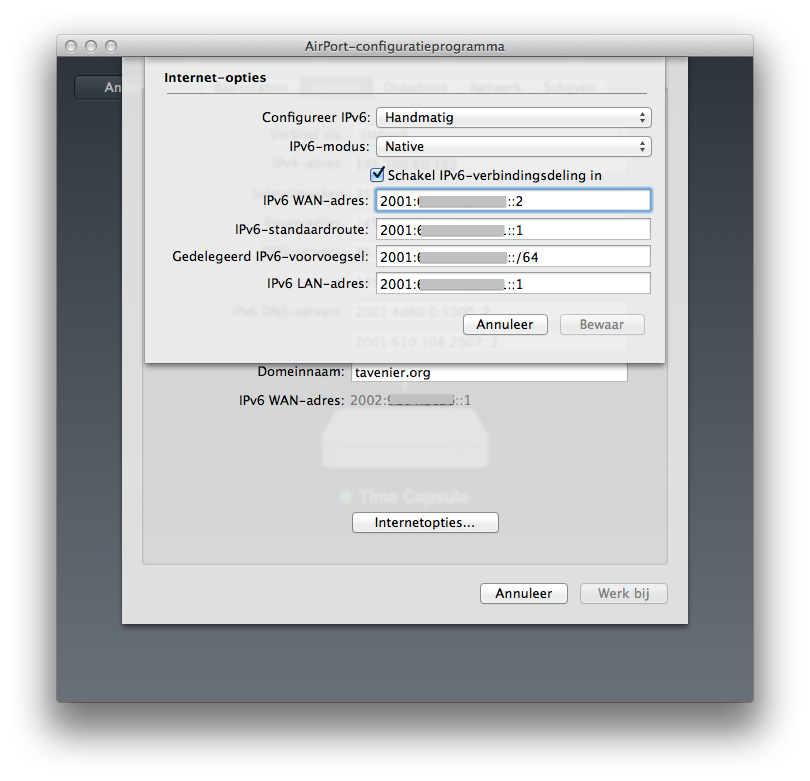
The weird thing is that in the configuration you can see my address was still manually configured to a IPv6 unicast prefix, but somehow Apple changed the active IPv6 on the WAN interface to the 6to4 prefix. You can see this in the picture below:
IPv6  configuration Time Capsule

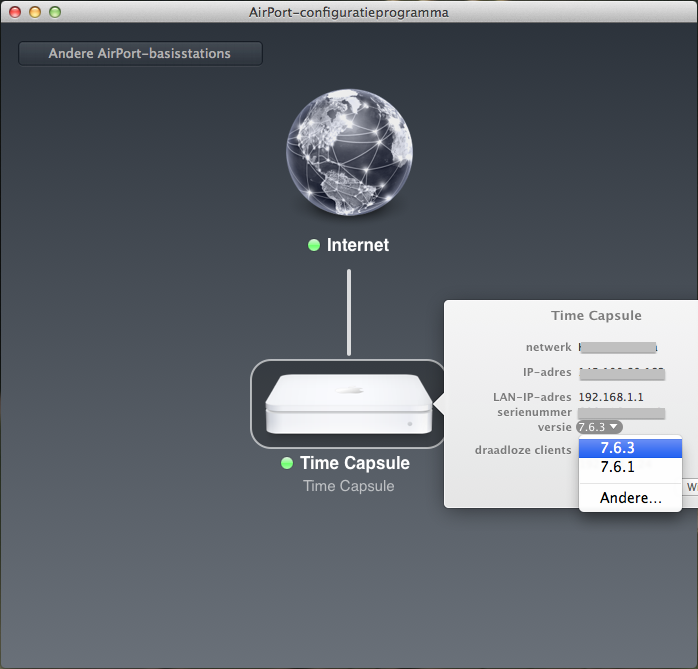
The only solution to get IPv6 to work again is to downgrade the Time Capsule. You need to click on your Time Capsule. When you hover over you version number and use the ‘option’ button when you click you get the option to select your previous version number. See the screenshot below:
Downgrade Time Capsule

After the downgrade to 7.6.1 I see that the configured IPv6 WAN address is the same as the active IPv6 address. A visit to test-ipv6.com shows that IPv6 is working again :).

Links
RIPE IPv6 reference card (very useful as a quick reference for the different IPv6 prefixes)